Trade Show Photography: Shoot, Share and Deliver Photos
The doors open soon, the booth team wants a clean product shot, and the organizer has just moved the keynote demonstration. Your camera is ready, but nobody has confirmed whether the prototype can appear in the public gallery. Meanwhile, marketing wants photos to share before visitors leave the hall.
Good trade show photography means managing those competing demands without losing the images that matter. The shoot plan needs to cover permissions, hall lighting, attendee retrieval and follow-up, not just what goes in the frame.
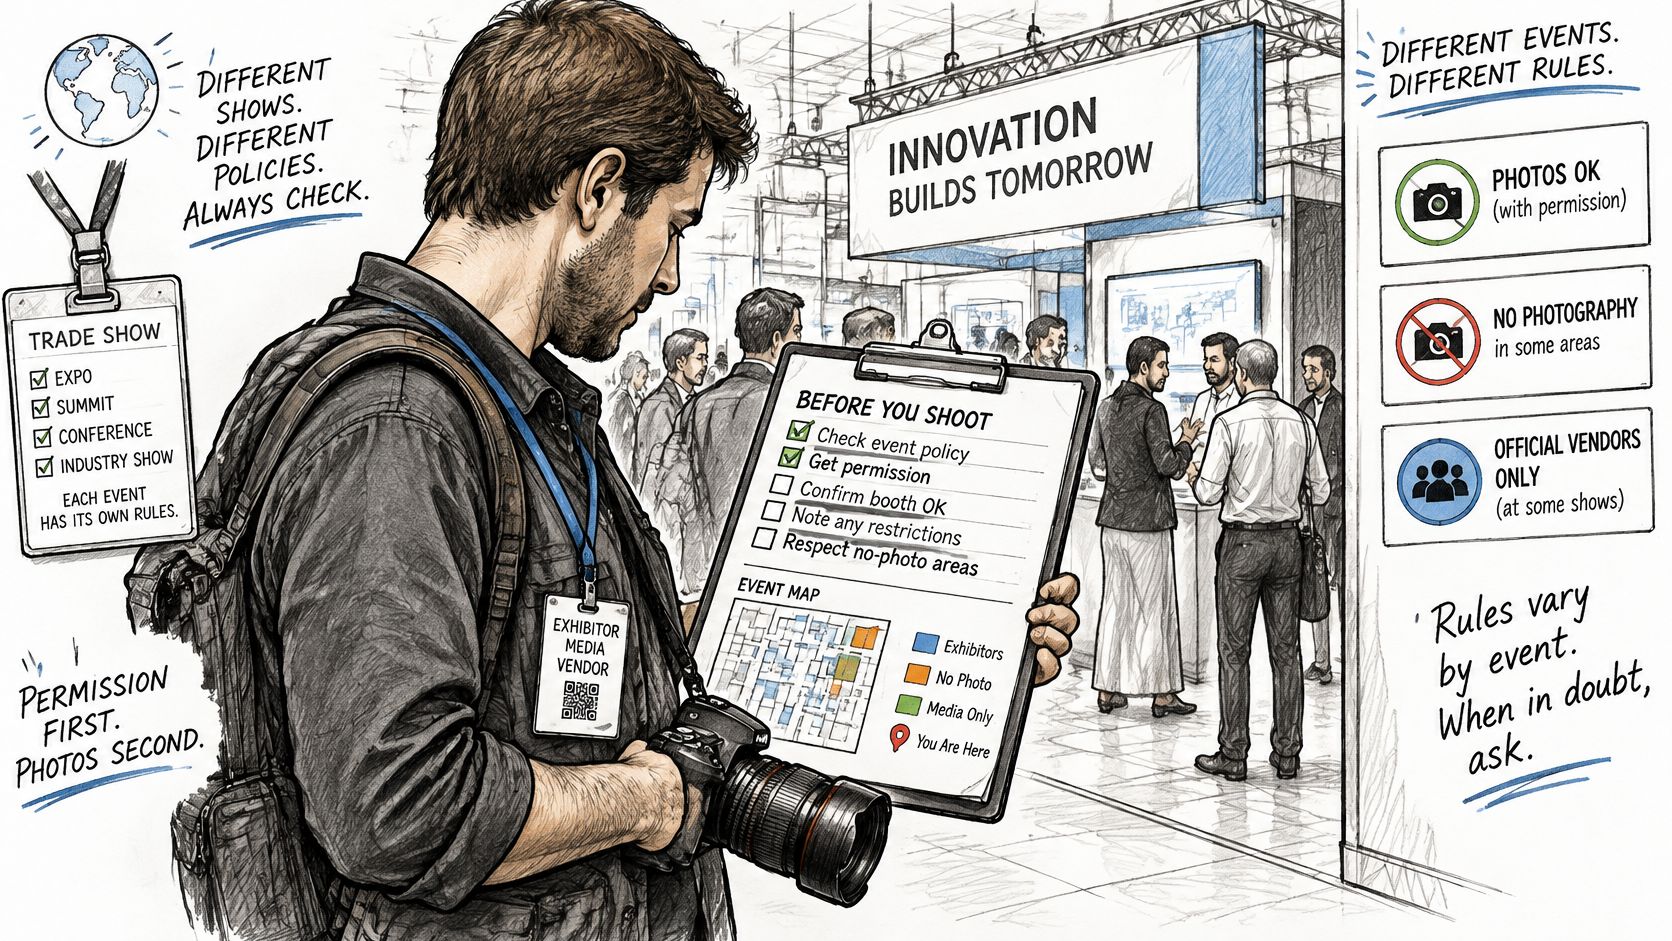
Permissions to Check Before Any Photo Goes Live
Check permission before the shutter opens, not just before publishing. A photographer's event credential isn't blanket authorization to photograph every booth, demonstration or visitor. Event-specific restrictions can include official-vendor requirements, permission to photograph another exhibitor's stand and approval for photo activations, issues highlighted in Progression Agency's trade show marketing guidance.
Treat organizer approval, exhibitor approval and attendee participation as separate checks. Someone may welcome a photograph for an internal recap but object to the same frame appearing in a sponsor's advertising.
Build a permission chain
- Confirm authority in writing. Ask the organizer what your credential allows, then confirm the exhibiting company's requirements with its designated contact. Record the permitted uses, not just permission to take pictures.
- Mark restricted areas on the shot list. Flag confidential products, private meeting spaces and demonstrations that require an escort. Give the photographer a recognizable booth contact who can resolve uncertainty.
- Separate crowd coverage from identifiable portraits. Keep broad atmosphere images and attendee-focused portraits in distinct review groups. Don't assume that appearing in an aisle settles permission for promotional use.
- Define access and usage rights. Specify who can download, repost, supply images to partners or use them commercially. Download access and an advertising license aren't interchangeable.
- Name the sponsor-content approver. Branded frames, sponsor overlays and promotional captions need an owner who can approve the complete asset.
Keep the permission checklist with the working shot list, where the photographer can consult it on the floor.
Release approved work, not everything
Create separate approved, review required and restricted groups before uploading. The organizer can publish approved photographs through an event photo sharing link or QR code photo gallery while the photographer routes sensitive frames to the right reviewer.
A faster handoff isn't better if it reveals an unreleased product or a competitor's confidential conversation. Hold restricted files in controlled storage under the agreed retention policy rather than deleting them to clear the publishing queue.
Practical rule: If you wouldn't hand this frame to the competitor across the aisle, put it in the review queue.
Name a substitute approver, too. A launch manager who's presenting onstage can't simultaneously clear a gallery, and the photographer shouldn't have to guess.
Shot Plan and Run of Show
Build the day around access windows and priority moments, not a route that merely visits every booth. Work from this run of show, then adjust it to the actual agenda.
- Get the floor plan and agenda. Mark priority booths, launches, speakers and demonstrations. Include walking time and identify moments that can't be repeated.
- Scout lighting zones at the expected shooting time. Check entrances, overhead fixtures, display walls and daylight spill. A booth beside the windows can require a different approach from one deep inside the hall.
- Photograph clean booths before doors open. Capture products, signage and the complete stand before visitors, drinks and rolling cases fill the scene.
- Return during peak traffic. Photograph real demonstrations, conversations and occupied meeting areas. Show engagement without asking staff to manufacture a crowd.
- Reserve the final hour for staff and repeatable demonstrations. Confirm availability first, since some teams begin packing early. Use quieter moments for portraits without interrupting sales conversations.
- Back up and label the work. Copy cards to separate drives each day, verify the copies and retain the cards until the backup is secure. Tag files by booth, time and approval status.
The scale makes organization essential: UFI's global exhibition statistics estimate approximately 32,000 exhibitions and 318 million visitors worldwide in 2024. At an individual show, clear booth identifiers help prevent a large image collection from becoming an unsearchable delivery problem.
Camera settings for the hall floor
Use these as starting settings, not guarantees. The shutter, aperture and ISO ranges follow Event Photojournalism's trade show photography guidance, which also recommends RAW capture, fixed white balance by lighting zone and checks for clipped highlights.
Camera settings and timing by booth shot type
| Shot type | Shutter speed | Aperture | ISO | Best time |
|---|---|---|---|---|
| Booth wide context | 1/125 second or faster | f/2.8 to f/4 | 800 to 1,600 | Before doors open |
| Product close-up | 1/200 second | f/4 | 800 to 1,600 | Before doors open or in quiet moments |
| Demonstration and interaction | 1/200 second | f/2.8 to f/4 | 800 to 1,600 | Peak traffic |
| Crowd and networking | 1/125 second or faster | f/4 | 800 to 1,600 | Peak traffic |
| Staff portrait | 1/200 second | f/2.8 to f/4 | 800 to 1,600 | Final hour |
Don't lower the shutter speed just to keep ISO tidy when hands are moving. Raise ISO or add permitted lighting instead. A stabilized lens can reduce camera shake, but it won't freeze a presenter's gesture.
Likewise, the suggested aperture range doesn't guarantee that a nearby face and distant sign will both be sharp. Align subjects more closely, increase depth of field when necessary and check the actual frame.
Shoot RAW and lock white balance within each lighting zone. Mixed fluorescent, LED and daylight can make adjacent images look inconsistent. Check LED displays for banding, particularly with an electronic shutter, and test the camera's mechanical shutter or flicker controls if needed.
Check the frame before leaving the booth
Expose for faces, then inspect the histogram and highlight warnings. If a screen contains essential product information, coordinate its brightness or make a separate exposure rather than sacrificing the people.
At each booth, review a wide context frame, a medium interaction and a close detail. Confirm readable signage, open eyes and a background free of litter, cases and distracting neighboring logos.
For a busy assignment, use a lead photographer for priority coverage, a peak-hour second shooter for simultaneous activity and a runner for card handling and coverage updates. Working solo, batch nearby booths and schedule uploads around immovable moments.
When time runs short, skip another generic aisle photograph. Reshoot the changed product, the missed demonstration or the unreadable brand sign.
Delivery Channels Compared for Fast Gallery Access
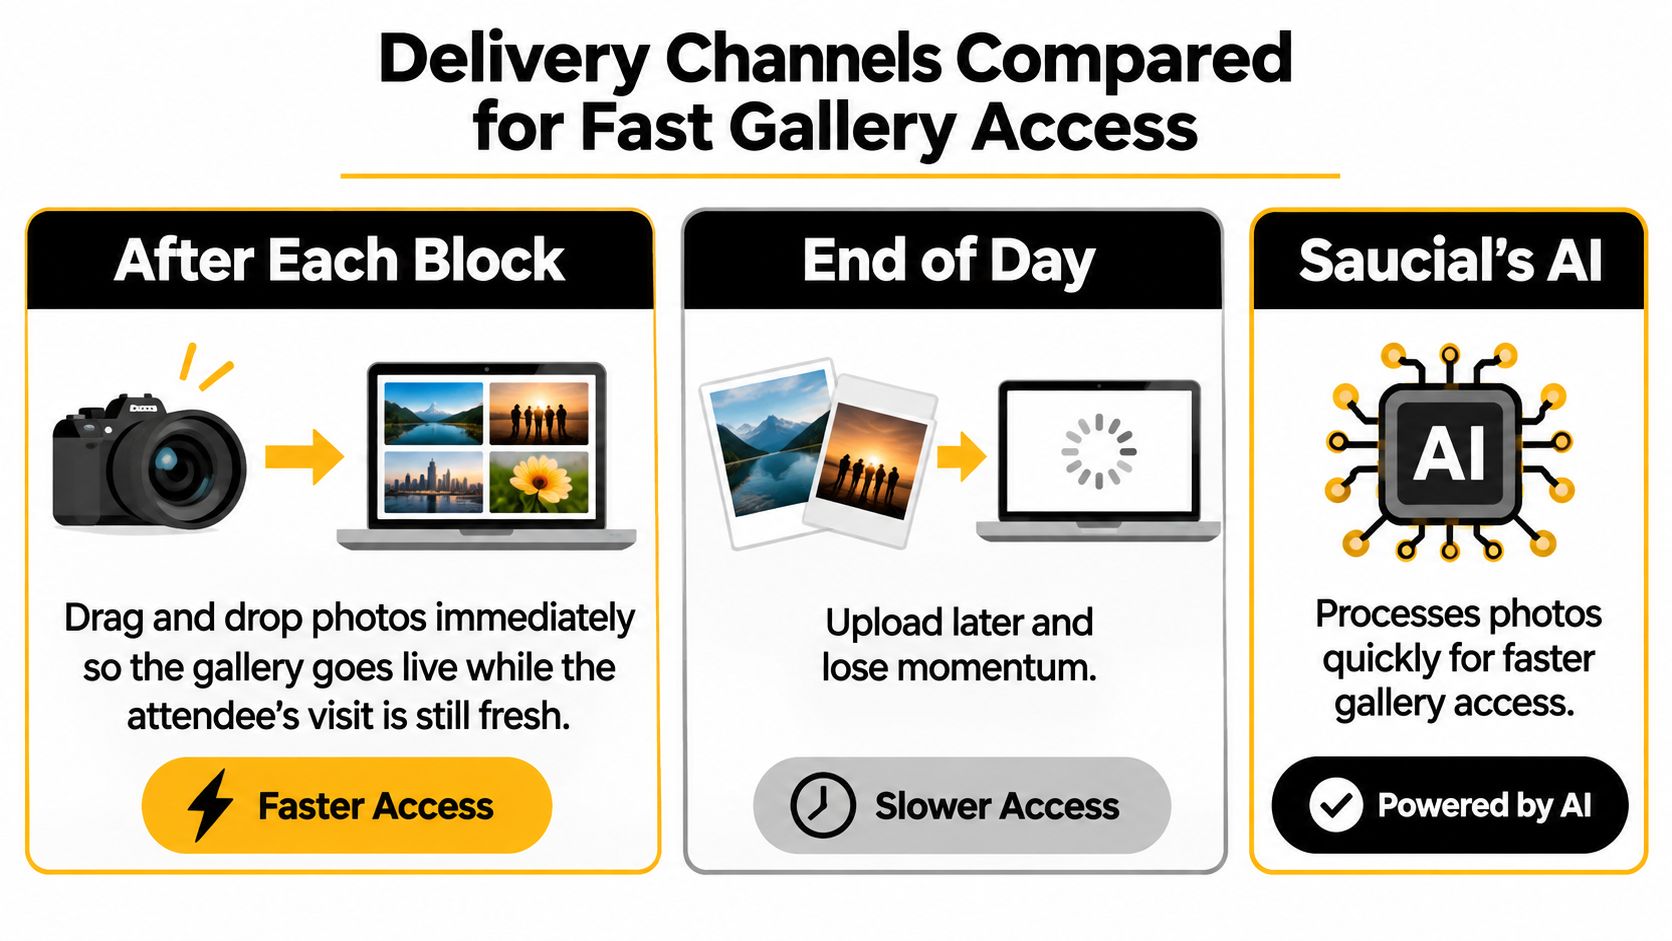
Upload a culled, approved batch after each shooting block, rather than leaving every transfer until the hall closes. That gives the team something useful to distribute while visitors still remember the interaction. Don't publish directly from a card without checking focus, duplicates and permission status.
At Saucial, organizers upload event photos by dragging and dropping them, and our AI processes faces in the background. We use AI-powered face recognition to find the event photos featuring each attendee, reducing the need to locate individual faces manually.
The operational difference is when the team makes approved photographs available.
Publish in controlled batches
- Finish the booth block. Cull weak frames and export web-size JPEG previews with consistent color.
- Transfer only approved files. Apply an approved-only selection in your working catalog or upload staging folder. Keep restricted work outside the publishing batch.
- Prepare the event destination. Generate the event photo sharing link and a QR code when on-site access is useful.
- Distribute intentionally. Choose the channels attendees use, with an owner responsible for each message.
- Check access and coverage. Review early visits, open the gallery on a phone and investigate missing priority booths.
Delivery channels for trade show photo galleries
| Channel | Best for | What the attendee does | Privacy note |
|---|---|---|---|
| QR code at booth or lead retrieval | Attendees on the spot, same day | Scan the code and open the gallery | Show only approved sets |
| Emailed gallery link | Leads and exhibitors after the show | Open the link and browse or search | Send only to opted-in contacts |
| WhatsApp or SMS message | Attendees who shared a number | Tap the link on their phone | Use opt-in lists only |
| Event website, LinkedIn or Instagram | Public recap and brand reach | Browse or follow the link | Post approved, non-restricted images only |
| Find My Photos selfie match | Attendees who want only their own photos | Take a selfie and see matched photos | Needs clear notice and organizer permission for face matching |
A QR code and a selfie search solve different problems. The code gets someone to the destination; matching helps them locate relevant images once they arrive. Neither replaces access controls, and a matching result shouldn't be treated as proof of identity.
Keep delivery usable under hall conditions
Face matching needs clear notice, organizer-controlled permissions and an appropriate consent process. Explain what the selfie is used for and provide a non-matching route where appropriate. Use a plain gallery when the event hasn't authorized facial matching.
Plan transfers around unreliable venue Wi-Fi. Arrange a wired connection where available, or test a dedicated hotspot before relying on it. Keep a local upload queue and send previews rather than RAW files so large transfers don't occupy the connection unnecessarily.
Allow for failed uploads, too. The person handling delivery should confirm that the batch is visible before telling booth staff to promote it.
This walkthrough provides a visual reference for the upload and attendee-access process.
Placing QR Codes and Designing the Attendee Experience
Put the code where a visitor can stop, understand the offer and use a phone. A large graphic beside a noisy demonstration may be highly visible but impractical to scan. A smaller sign at the meeting table can be more useful because someone has time to act.
Placement deserves operational attention. In Event Marketer's coverage of the EventTrack 2024 study, 66% of trade show exhibitors identified on-site engagement as their most critical event metric.
Choose a natural pause point
- Booth exits and meeting tables: Position the code beside brochures or meeting materials, where visitors finish their conversation.
- Lead retrieval lines: Give waiting attendees a clear photo-access sign without blocking badge scanning.
- Lounge tables: Use stable tabletop signs that remain visible when cups and bags arrive.
- Stage-adjacent screens: Display the code when the audience has time to respond, rather than competing with essential presentation content.
Mount standing signs around eye level and make the code readable at a comfortable arm's length. Preserve clear space around it, use strong contrast and add a short instruction such as Find your photos from today. Avoid floor placements, reflective surfaces and screens with glare.
Don't place the sign inside the product photograph's background. The photographer needs a clean brand asset, while the visitor needs a clear route to the gallery.
Make the next action obvious
For an authorized selfie-matching experience, attendees scan, take a selfie and instantly see all photos featuring them in the available gallery. Put the purpose and privacy explanation before the selfie action, not behind a footer link that visitors won't notice.
Design the mobile page to load quickly and avoid unnecessary account creation or app installation. If guests reach an empty gallery because the latest batch isn't available yet, tell them plainly and offer the event's approved return route. Don't suggest the photographer missed them when their photographs may still be awaiting review.
A scan isn't a successful retrieval. Test until an attendee can reach a relevant photograph, not merely open a landing page.
Before doors open, run a short physical check:
- Test different phones: Try the sign on several devices, including one using mobile data instead of venue Wi-Fi.
- Print a backup address: Keep a readable, organizer-approved gallery address at the desk for visitors whose cameras won't scan.
- Brief booth staff: Ask them to mention photo access naturally at the end of a conversation.
- Check the destination: Confirm the code opens the intended event, not a test gallery or an expired page.
Measuring Post-Event Engagement and Follow-Up
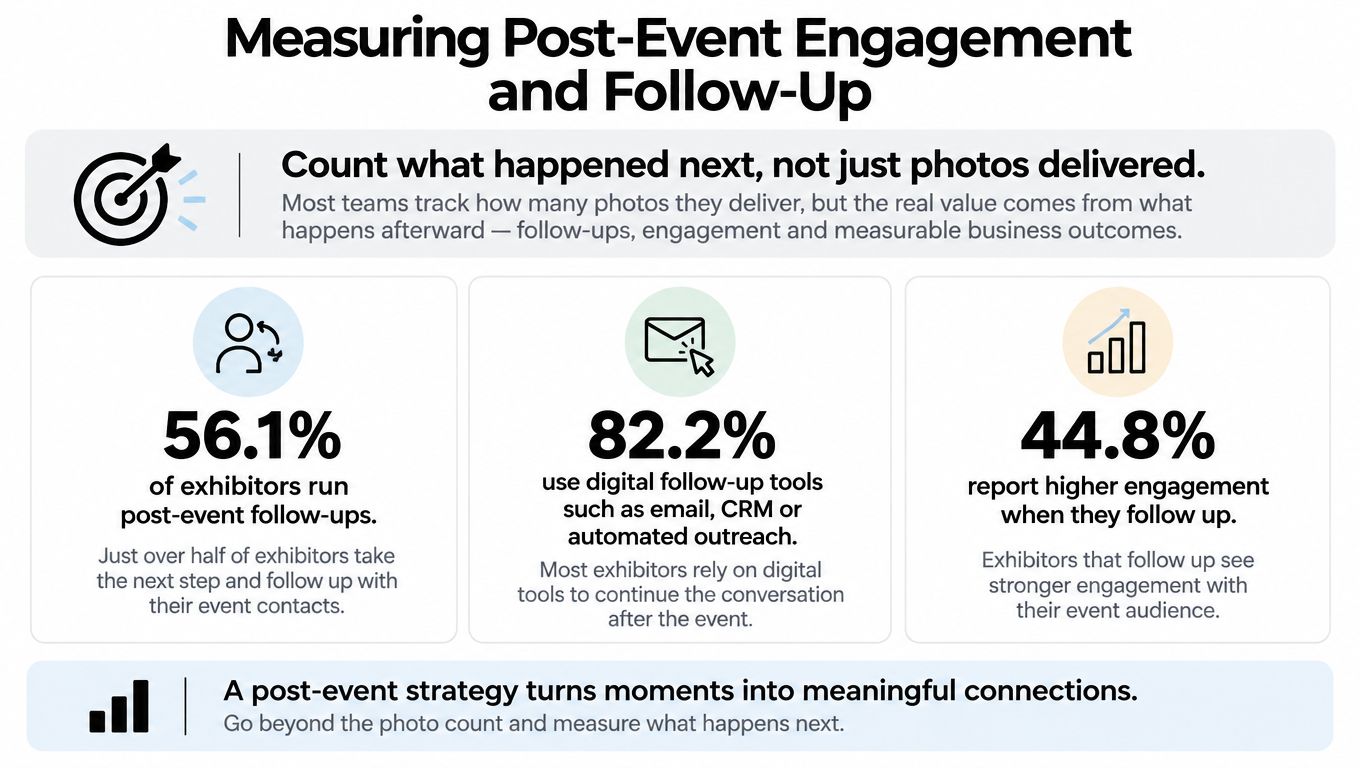
Teams often count delivered files without checking whether attendees used them. Discount Displays' trade show survey reporting indicates that 56.1% of exhibitors perform post-event follow-ups, 82.2% use email for lead follow-up and 30.8% use social media for that purpose. Those findings support putting gallery access in the follow-up email sequence, not leaving it solely in a social recap.
Tie the gallery to a useful next action. A demonstration photograph can accompany an approved product-information email; a staff portrait can support a personal introduction. Keep photo access separate from optional marketing consent so the attendee doesn't have to become a sales lead to retrieve an image.
Measure what happened after delivery, rather than treating the file count as the outcome.
Build a report the exhibitor can use
Use gallery analytics where available, tagged distribution links and a simple support log. Don't assume every platform records every action, and label estimates separately from directly recorded events.
Post-event photo metrics and how to track them
| Metric | What it shows | How to track it |
|---|---|---|
| Gallery visits | Reach of the post-event link | Analytics on link and QR opens |
| Photo retrievals | Attendees who found their own images | Count of completed selfie matches |
| Shares and reposts | Organic reach on social channels | Count tagged posts and link clicks |
| Downloads and optional upsells | Interest in extra or paid content | Download counts and sales of approved sets |
| Follow-up opt-ins | Permission-based leads | Count of consented contacts only |
| Requests about finding photos | Admin time saved | Log of inbound questions each week |
Define each metric before comparing events. A completed match isn't necessarily a unique attendee, and a tagged post doesn't reveal every private share. Likewise, downloads show interest in photographs, not confirmed product purchases.
For optional photographer upsells to attendees, distinguish included access from paid prints, premium edits or approved branded frames. Report those transactions separately from exhibitor lead outcomes.
Compare retrieval methods fairly
At the next suitable show, compare a conventional folder link with a Find My Photos route across comparable, randomly assigned attendee groups. Keep the photographs, message, timing and access entitlement consistent. Use matching only for participants covered by the appropriate notice and permissions.
Compare completed retrievals and follow-up replies, not clicks alone. Record how long staff spend answering photo-search requests, because fewer questions only demonstrate time saved when the team also measures handling time.
Share aggregate engagement with exhibitors and keep personally identifiable information out of the report unless the attendee has opted in to that use. Don't pass along selfies or facial-search information as lead data.
The useful budget-review conclusion is specific: attendees accessed their photographs, the team handled fewer manual searches, or approved content supported follow-up. None of those outcomes, by itself, proves that photography caused a sale.
Your First Step Before the Next Show
Pick an upcoming event this week and prepare a small, executable coverage brief. Choose its priority booths, identify the product or interaction each needs photographed and send the organizer a written permission request before committing to the activation or publishing plan.
Don't start with a longer equipment list. Start by asking which photograph the exhibitor needs after the show and what it must help them do. A product launch, recruitment stand and sponsor lounge need different evidence.
Turn the brief into assignments
- Choose the essential frames: For a sample plan covering three priority booths, assign a clean stand image, a meaningful interaction and a product detail to each.
- Assign the decisions: Name the organizer contact, exhibitor approver and person responsible for gallery publication.
- Protect the critical moments: Put launches and non-repeatable demonstrations into the photographer's calendar, with travel time.
- Record a usable baseline: Save available gallery visits, retrievals, consented follow-up contacts and support requests from a comparable event. If nothing was measured previously, label the next show as the baseline.
Use the camera-settings table as a starting reference, then leave room in the brief for lighting-test results. Schedule the physical QR test at the registration desk before visitors arrive, and make someone responsible for correcting a failed destination.
Rehearse the busiest hour
Walk through a scenario in which the demonstration runs late, the connection drops and the approver is unavailable. Decide which photographs wait, who can authorize a release and how staff explain the delay to attendees.
Keep the pilot narrow enough that the team can finish it properly. A dependable gallery for priority coverage is more useful than an ambitious delivery promise nobody can maintain.
The best delivery plan is the one your team can run during the busiest hour of the show. Put the permission request, coverage assignments and delivery rehearsal on the calendar now.
Saucial offers drag-and-drop uploads, a shareable event link and QR code, and selfie-based Find My Photos access, with organizer controls over what's shared and what attendees can access. Visit Saucial to plan a trade show photo-sharing workflow that connects approved coverage with attendee retrieval and measurable follow-up.