How to Make Panorama Pictures: A Practical Guide
You're standing at the edge of a crowded reception room, trying to fit the dance floor, stage, tables, and balcony into one frame. You start a quick phone panorama, follow the guide across the screen, and hope the software handles the rest. Later, the result shows a wavy ceiling, smeared guests, bright bands across the room, and faces appearing twice.
That failure doesn't mean panorama photography is unreliable. It usually means the capture sequence ignored a few mechanical details that stitching software can't repair afterward. Learning how to make panorama pictures properly comes down to controlling rotation, exposure, focus, overlap, movement, and the final use of the image.
The Panorama You Almost Didn't Take
At a wedding reception, a fast handheld panorama can turn a beautiful room into visual evidence of every rushed decision. The photographer may begin with the bride and groom near the dance floor, sweep past guests holding drinks, cross a brightly lit stage, and finish near a dark entrance. During that short movement, people shift, the phone tilts, autofocus changes, and the camera adjusts brightness several times.
The final file may contain a guest with a second shoulder, a chandelier stretched into a curve, and a ceiling that rises and falls across the frame. A person walking through the overlap zone can appear as a translucent figure, while a table near the camera may jump sideways from one frame to the next.
Practical rule: A panorama is a sequence of carefully related photographs, not one photograph made by moving quickly.
The problems are predictable:
- Parallax appears when the camera rotates around the wrong point, making nearby objects shift against distant ones.
- Exposure drift creates visible brightness bands when the camera meters repeatedly during the sweep.
- Moving subjects produce ghosting, duplicates, or missing body parts in shared frame areas.
- Handheld tilt bends horizons and stretches architecture.
- Insufficient overlap leaves stitching software without enough repeated detail to align adjacent frames.
- Inconsistent white balance causes color changes across the finished image.
- Poor format choice creates unnecessary risk when a wide-angle lens or single frame would tell the story more cleanly.
Panoramas have been part of photography almost from the medium's beginning. The Library of Congress history of panoramic photography describes early photographers placing multiple daguerreotype plates side by side shortly after photography emerged in 1839. By the 1840s, specialized panoramic cameras were being patented and manufactured, including Joseph Puchberger's 1843 swing-lens design with a 150-degree field of view.
The same core idea still applies today: capture overlapping segments, then combine them into a wider view. A disciplined pre-shoot routine is the first line of defense.
A Pre-Shoot Workflow That Prevents Most Failures
At a crowded reception or in a quiet location, a short pre-shoot check prevents the same failures that are difficult to fix later. The routine takes less than a minute and applies to both phone panoramas and multi-shot sequences on a mirrorless camera. Each depends on a fixed rotation path and consistent image information.
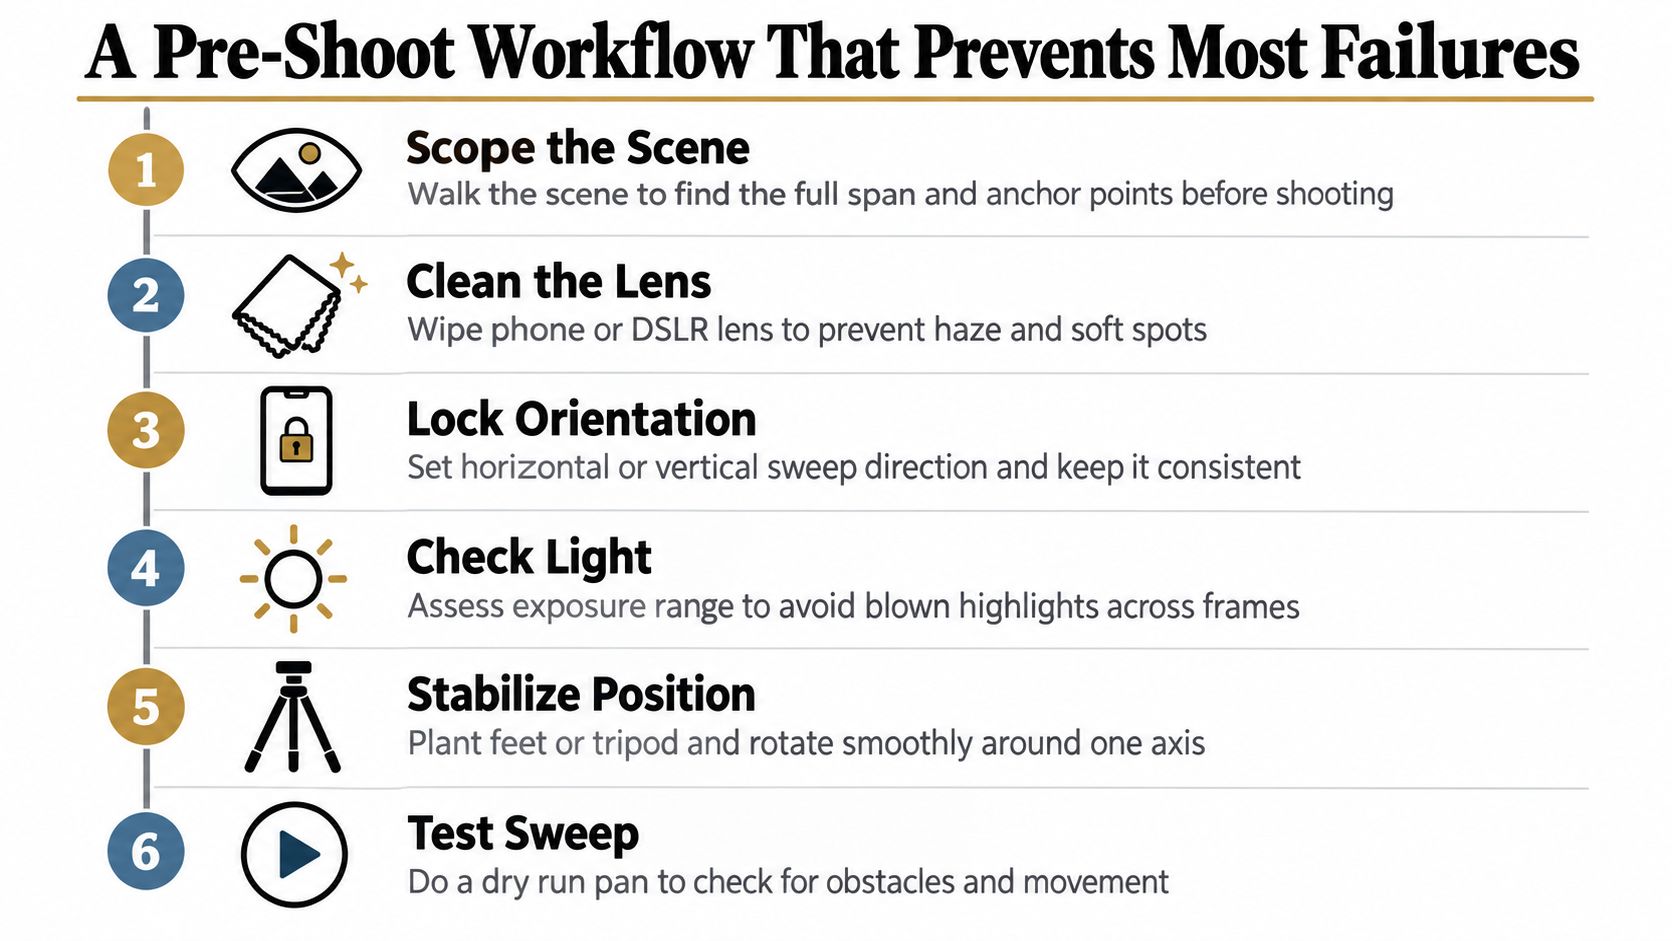
Stand where the camera will rotate and scan from the left boundary to the right. Decide what the frame must include before people, staff, or changing light force a rushed sweep. In a banquet hall, the full stage may matter more than a service corridor at the edge. In a busy venue, also identify the moments when guests are likely to cross the scene.
Six checks before pressing the shutter
Scope the scene. Set the left and right limits, then locate fixed details such as doorframes, signs, railings, and light fixtures. These give stitching software dependable alignment points when people move between frames.
Clean the lens. A fingerprint or haze on a phone lens can repeat across the sequence, leaving one side softer than the other. Wipe the lens before composing, especially under stage lighting or atmospheric haze.
Lock orientation. Choose a horizontal or vertical sweep before shooting. Vertical framing preserves more height for people, architecture, and tall interiors, while horizontal framing suits a low, open view and can be quicker to complete.
Check the light. Inspect both ends of the sweep. Windows, spotlights, and bright outdoor openings can exceed the scene's usable exposure range, so decide whether a locked exposure will hold detail or whether a different position is safer.
Stabilize your position. Plant your feet or level the tripod. Establish the rotation axis and keep it fixed. Stepping sideways during the sweep changes foreground geometry, which is especially damaging around nearby chairs, railings, or guests.
Test the sweep. Make a dry run without recording. Watch for cables, chairs, entering guests, and lighting changes that could force you to stop or alter speed.
Leave about 30 to 50 percent of each frame visible in the next one. That overlap gives the software repeated detail to match. Less can leave too few alignment features, while much more increases the number of frames and the chance that people or light will change during capture.
Lock focus and exposure before the first frame. On a camera, use manual settings. On a phone, use the focus and exposure lock gesture when available. This habit prevents a bright window or stage light from creating a visible transition across the finished panorama. For a closer examination of alignment practice, see this panorama stitching photography guide.
Shooting Panoramas With Your Smartphone
A smartphone panorama mode performs the alignment automatically, but automation doesn't remove the need for careful movement. The phone still has to record a stable series of views while its software searches for matching details.
The rotation point is the part most casual instructions underplay. A phone's lens sits near the top portion of the device, not at its geometric center. If you swing the phone around the middle of its body, nearby subjects can shift significantly against the background. That's why straight lines near the camera often warp, and why a person close to the lens may appear stretched or duplicated.
Hold the phone with both hands and keep its lower edge near your sternum or chin. Pivot from your hips while keeping the phone parallel to the arc of rotation. Don't walk as you pan. Walking changes the camera's position and makes foreground objects move relative to the background, which is one of the quickest ways to create a broken panorama.
Phone settings and body position
Most modern phones let you lock focus and exposure with a long press on the image area. Use that control on a representative part of the scene before starting the sweep. Without a lock, the phone can re-meter when it reaches a bright window or stage light, producing a visible transition between frames.
For a taller final image, hold the phone sideways and pan left to right. This gives each captured segment more vertical space and leaves a stronger file after the software crops the irregular top and bottom edges. Keep the guide line level, but don't chase it with exaggerated wrist movements. Smooth, controlled rotation is safer than trying to correct every tiny deviation.
Bracing helps in crowded indoor spaces. Keep your elbows close to your body, use a wall or column when possible, and rotate your torso rather than your forearms. A small phone tripod with a panning base can improve consistency when the scene is static, though it won't solve movement from guests or performers.
When people are moving
Crowded events require timing. Wait for a brief lull, place important people near the beginning or end of the sweep, or choose a single wide frame instead. Someone crossing the overlap zone can be recorded in two positions, and the phone has no reliable way to know which version belongs in the final image.
A phone panorama is particularly risky when close foreground subjects sit beside a busy background. If you must attempt it, slow the pan, preserve repeated fixed details, and review the entire result immediately. Don't assume a smooth on-screen guide guarantees clean seams.
Capturing Multi-Shot Panoramas on a DSLR or Mirrorless
A multi-shot panorama gives you more control than a phone mode, but every frame must match its neighbors. The sequence begins before the first shutter press, with the camera set for consistency rather than convenience.
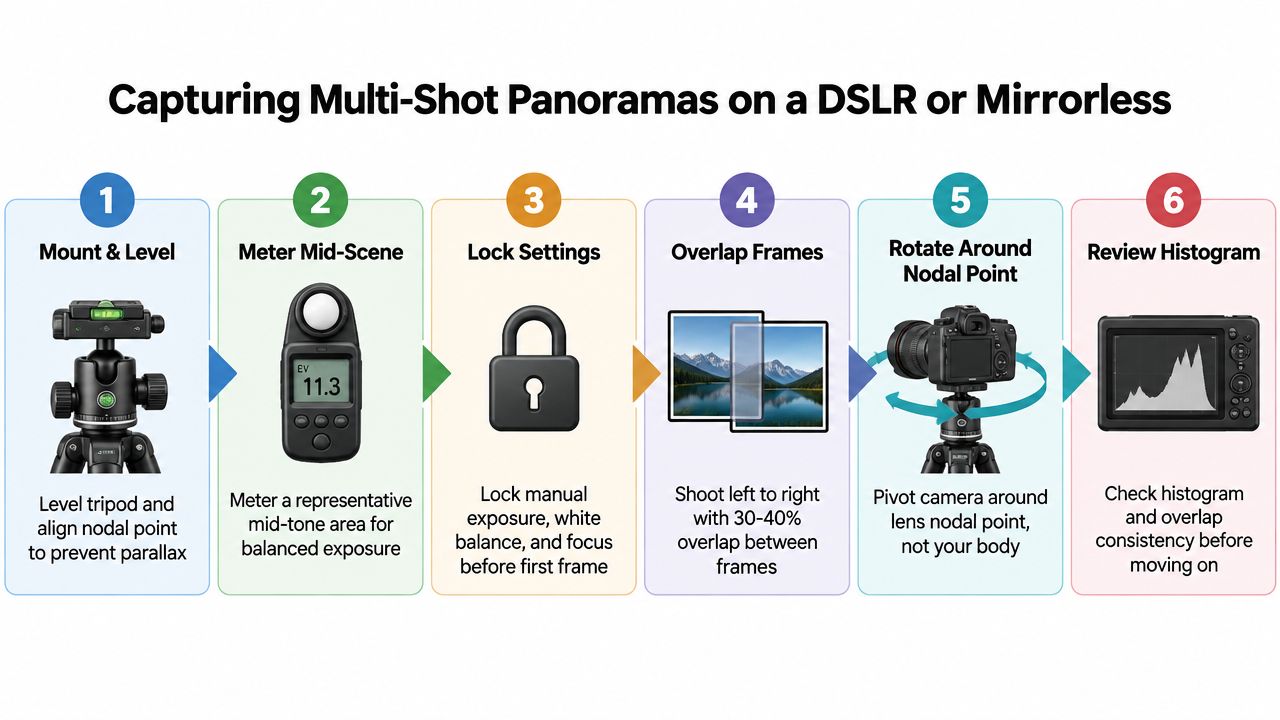
Mount the camera on a sturdy tripod and level the head. The ideal setup rotates around the lens's no-parallax point, often called the nodal point in practical panorama work. This keeps foreground and background objects from shifting against each other as the camera turns. If the foreground is close, the benefit becomes much more noticeable.
Lock the sequence before shooting
Set manual exposure after metering a representative mid-scene area. Don't let the camera choose a different shutter speed for a bright window and then a dark wall. Lock white balance as well, because an automatic setting can change color as the camera moves between warm interior lights and cooler daylight.
Focus on a useful middle-distance subject, then switch to manual focus. Stabilization should be disabled when the camera is firmly mounted on a tripod, since some systems can introduce movement while trying to correct motion that isn't present.
Choose a focal length that balances coverage and distortion. A moderate range around 35 to 50mm is often forgiving for a multi-shot stitch, while an ultra-wide lens can introduce more barrel distortion for the software to correct. The best setting still depends on the scene, the lens, and the distance to nearby objects.
Build reliable overlap
Shoot in one direction, usually from left to right, and keep the horizon in the same vertical position in every frame. Aim for roughly 30 to 50 percent overlap between adjacent images. At a 6000×4000 sensor size, a 35 percent overlap represents about 2100 pixels of shared content, according to this panoramic stitching tutorial.
Use live view gridlines, a bubble level, or fixed architectural lines to check alignment. After the last frame, review the sequence on the rear screen. Confirm that every adjacent pair includes repeated, identifiable features. The same guide notes that a foreground residual above about 4.5 pixels in stitching software can indicate a need to recapture with a better nodal-point setup.
For tall architecture, waterfalls, or stage structures, rotate the camera through a vertical composition rather than forcing everything into a narrow horizontal strip. When shooting handheld at slower shutter speeds, use a short burst where appropriate so you have a sharper frame to select for each position.
Stitching Software Worth Your Time
The right stitching tool depends less on brand familiarity than on the kind of problem it must solve. A quiet vista with clean overlap can work in a basic editor. A reception with people, reflective surfaces, and complicated lines benefits from control-point editing and seam control.
| Software | Best For | RAW Support | Price Tier |
|---|---|---|---|
| Adobe Lightroom Photomerge | Fast RAW workflow and straightforward panoramas | Yes, with RAW-to-DNG workflow | Paid subscription |
| PTGui Pro | Difficult scenes, detailed alignment, and masking | Camera RAW workflow varies by input | Paid professional |
| Hugin | Hands-on technical control without a commercial license | Depends on conversion workflow | Free |
| Microsoft ICE | Simple stitching on Windows systems | Depends on converted files | Free |
| Snapseed | Mobile finishing and quick adjustments | Mobile image workflow | Free |
| Panorama Crop | Fast mobile panorama cleanup and cropping | Mobile image workflow | Free |
Lightroom's Photomerge is practical when the goal is a quick delivery from RAW files. It keeps the process close to catalog, adjustment, and export work, and its perspective options can handle ordinary venue sequences without much intervention.
PTGui Pro makes more sense when the first automated result isn't good enough. It gives you more direct control over control points, projections, and masks, which matters when one moving person or a difficult foreground object disrupts an otherwise usable stitch. Hugin serves a similar technically minded audience, but expects more patience and manual involvement.
Free tools can still be useful. Microsoft ICE is suited to simple no-cost stitching on Windows, while mobile tools such as Snapseed and Panorama Crop are convenient after a phone has already created the panorama. They aren't replacements for careful capture, and mobile editing usually offers less control over individual source frames.
During an event turnaround, prioritize RAW handling, batch processing, fast control-point placement, lens profiles, and masking. Cloud editors can help when you're working on location, but upload time, privacy settings, and unreliable venue connectivity can make a local workflow safer. If you need to collect source files for a broader event gallery, upload your panorama files through Saucial as part of the delivery workflow, while keeping the stitched master and original frames organized separately.
Troubleshooting Stitching Errors and Bad Seams
A bad panorama often starts before the software opens. At a crowded reception, a guest can cross the overlap while you turn, while a quiet vista may fail because the camera pivots around the wrong point. Stitching can blend pixels, but it cannot recreate a missing viewpoint or place two moving subjects in one position.
Match the symptom to the cause
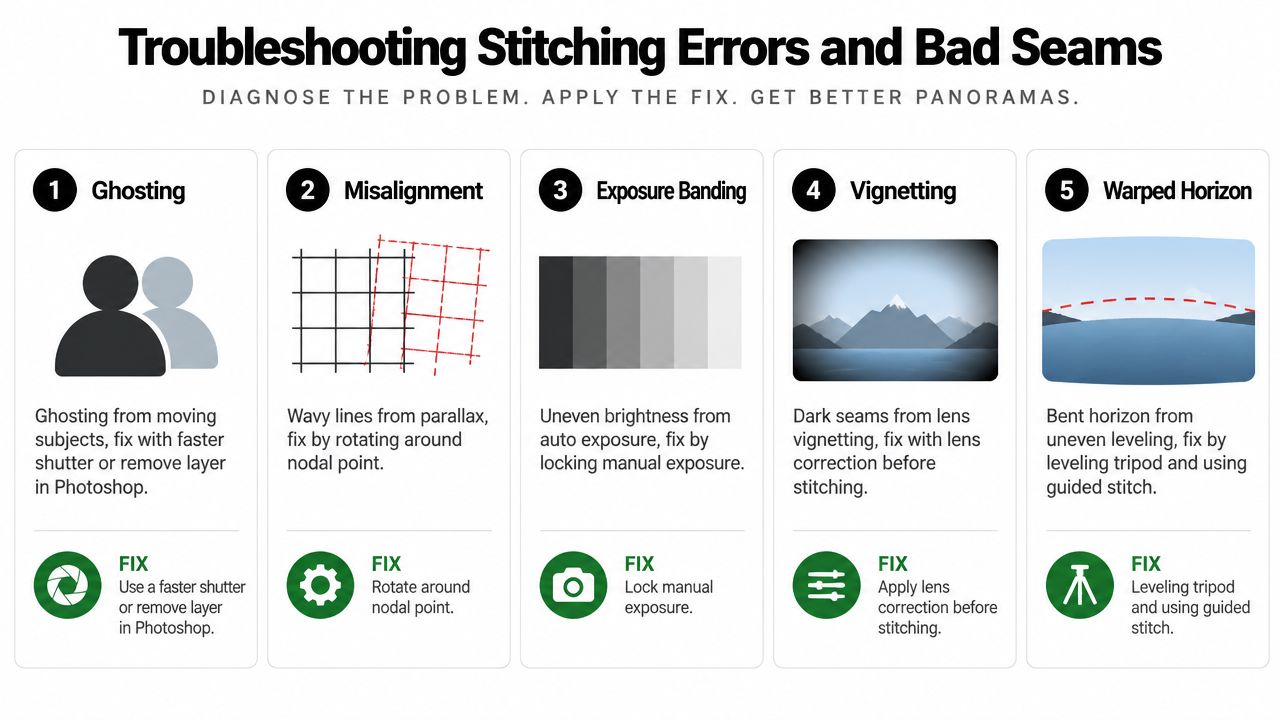
Ghosting usually means a subject moved through shared content. If you can reshoot, raise the shutter speed and wait for a stable moment. If the frames are otherwise usable, remove the offending area in Photoshop or mask in the cleaner version. At events, pause briefly when someone enters the overlap rather than completing the sweep through the movement.
Wavy horizons and bent architecture usually come from parallax or inconsistent leveling. Rotating around the camera body changes the relationship between nearby and distant objects, especially with a railing, table, or person in the foreground. Rotate around the lens's no-parallax point when possible, and keep the tripod head level. Handheld shooters should keep the camera close to one height and turn their body smoothly.
Exposure banding follows brightness changes between frames. Lock manual exposure before starting, then meter a useful middle area instead of letting the camera react to each part of the room. Mild banding may respond to blend modes or selective masking. Large shifts are quicker to prevent than repair.
Gaps and failed merges mean the software lacks enough matching detail. Increase overlap, include stationary features, and review the sequence before leaving. A practical target is about 30 to 50 percent overlap. In a busy venue, aim toward fixed architecture rather than faces or screens that may change between frames.
Dark seams or changing color can result from vignetting or white balance changes. Apply lens correction before stitching where appropriate, and keep white balance fixed throughout the sequence. Crop irregular edges after stitching. Content-aware fill is suitable only for small, uncomplicated gaps.
Software should provide the final correction, not the capture plan. Modern stitching tools can optimize local seams even when registration is imperfect, but close foreground elements remain unforgiving. If a control point fails badly, recapture the sequence rather than spending an hour on masks.
Choosing When a Panorama Is the Right Call
A panorama earns its place when the scene is wider than your single frame can communicate and the subjects can remain stable long enough for a controlled sequence. Long banquet halls, stage-and-audience layouts, and outdoor festival grounds often create that need. A stitched image can show the relationship between the crowd, venue, and focal action without forcing the photographer into an extreme wide-angle perspective.
A wide-angle lens is usually the safer choice when movement matters more than total coverage. A low-light reception, a fast dance-floor moment, or a crowd pressing toward the camera can change between frames too quickly. In those situations, one well-exposed high-ISO frame may tell the story more effectively than a technically wider image full of duplicated guests.
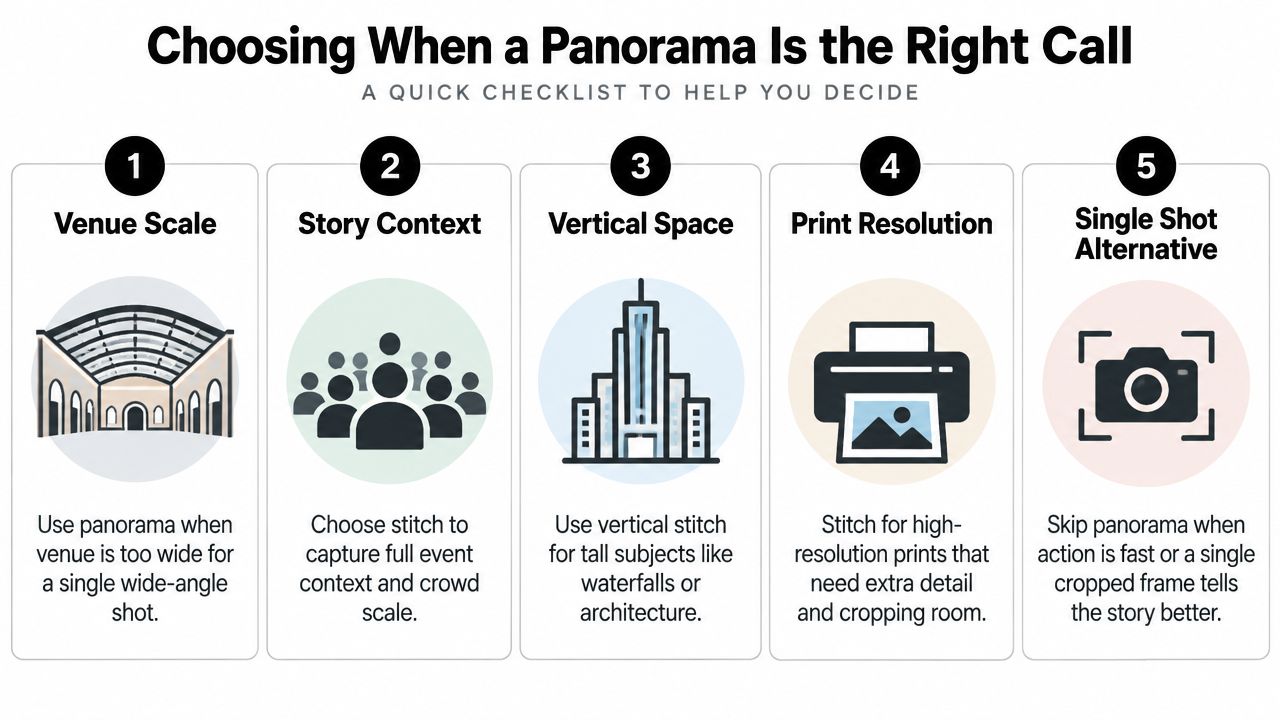
Make the format decision before the event
Walk through the venue before guests arrive and note the required angle of view. Then choose among a stitched panorama, an ultra-wide frame, a vertical stitch, or coverage from multiple cameras.
- Use a horizontal stitch for a wide room, or crowd context when the horizon and subjects are reasonably stable.
- Use a vertical stitch for tall buildings, waterfalls, stage structures, or interiors where height matters as much as width.
- Use a single wide frame when people, performers, or changing light make repeated capture unsafe.
- Use multiple cameras when the event requires simultaneous coverage rather than one expansive composition.
Delivery should influence the capture. A panorama intended for a long print needs clean edges and enough resolution for cropping. A web viewer or interactive embed can preserve the wide relationship between spaces, while a social post may require a carefully cropped version that still works on a narrow screen.
For event teams, a finished panorama can sit alongside a searchable event photo sharing link rather than in an isolated folder. Organizers can use a QR code photo gallery or attendee-facing find my photos experience to distribute the complete event collection, while the panorama serves as a venue or atmosphere image. Always confirm consent, sharing permissions, and organizer controls before enabling selfie photo matching or a face recognition event gallery.
Saucial helps photographers and organizers turn event images into a simpler find my photos experience, with uploads, shareable galleries, QR distribution, and selfie-based retrieval for attendees. Visit Saucial to see how you can deliver panorama pictures alongside the rest of a gala fundraiser photo gallery, festival collection, or trade show photo sharing workflow.