Conference Photography Tips: Sharp Shots in 2026
A conference gallery can lose its audience before the photographer has finished editing it. 69% of guests share event photos on social media within 24 hours, while engagement drops by 80% after the first two hours, according to independent event-photography research. That changes the job. Sharp exposures and attractive compositions still matter, but so do the route from camera card to attendee, the QR code at the venue entrance, and the privacy controls behind a “find my photos” experience.
Conference photography rewards preparation more than improvisation. You're covering speakers who won't repeat a gesture, attendees who don't want to be interrupted, sponsors who need visible brand context, and organizers who may want usable images while the event is still happening. The workflow below treats capture and delivery as one operation.
Why Conference Shoots Demand a Different Playbook
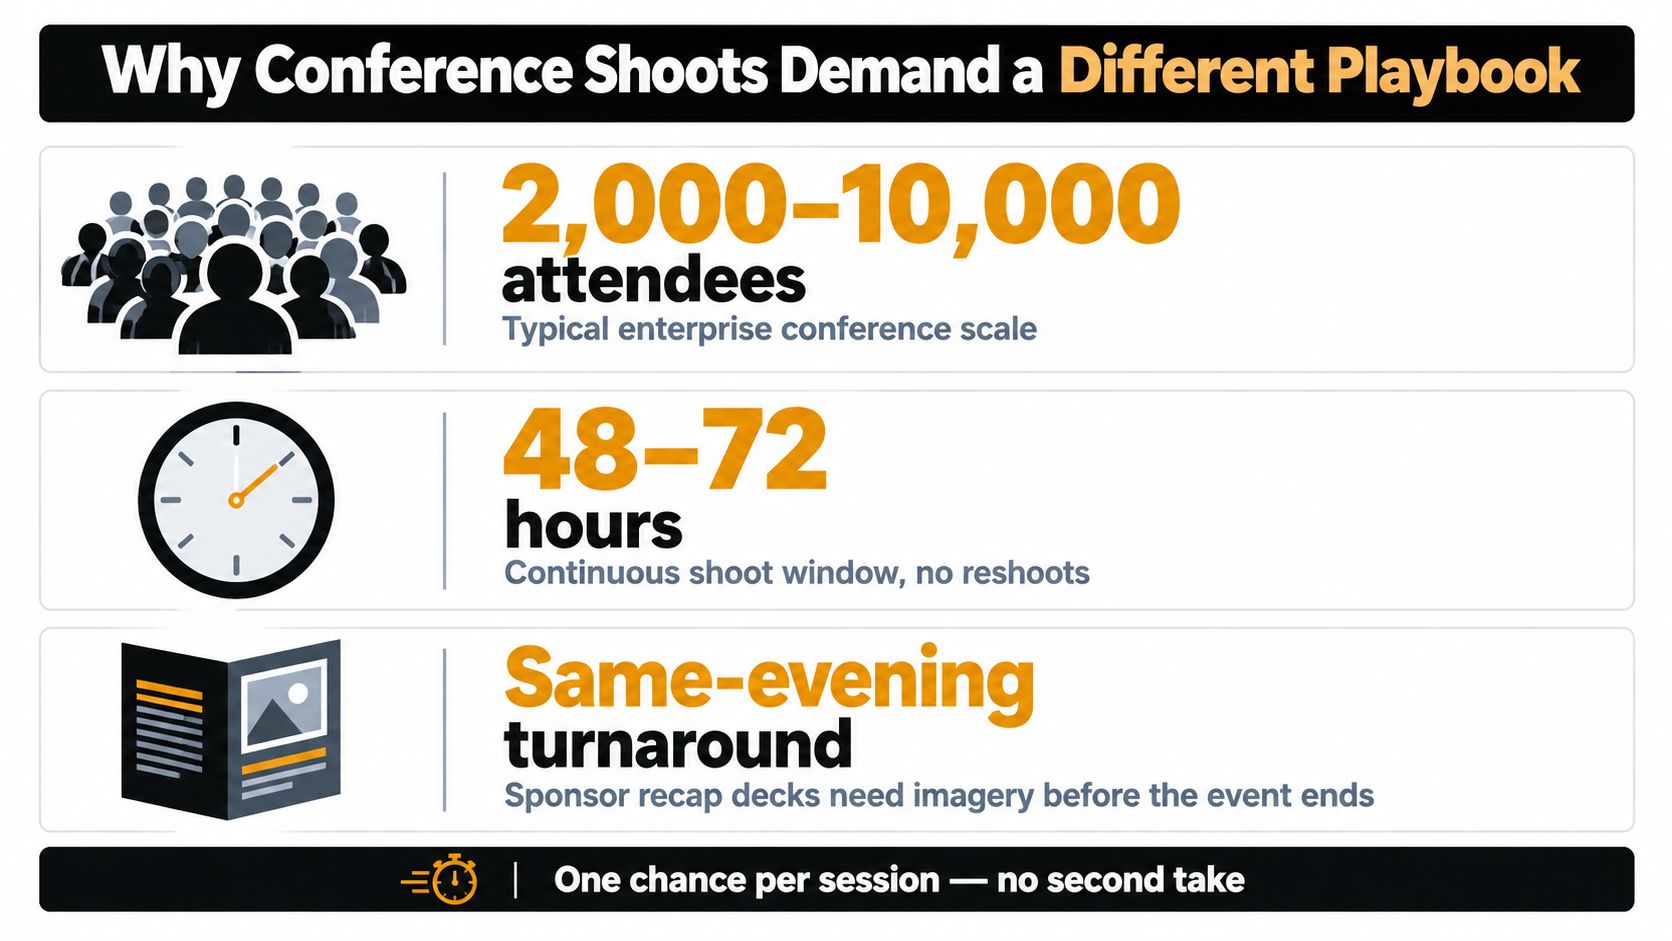
A typical full-day conference can produce 800 to 2,000 raw frames, while a three-day corporate summit may generate 5,000 to 7,000 raw images, according to this industry guide to conference photography. Those files come from very different environments: keynote stages, breakout rooms, registration desks, networking areas, exhibition stands, and crowded receptions. Each setting demands a slightly different exposure, position, and visual intention.
The volume also explains why conference work is priced as production rather than just attendance. The same guide places common conference-photography pricing between $1,500 and $5,000 per day, depending on experience, deliverables, and market. The fee reflects the pressure of covering an unrepeatable program, processing a large volume of material, and delivering images that marketing teams can use quickly.
Four pressures shape every decision
- One-take moments: A keynote entrance, award handoff, audience reaction, or executive greeting may last seconds. There's no reshoot once the speaker has left the stage or the room has moved on.
- Mixed lighting zones: Stage spots, projection screens, window light, LED washes, and dim audience areas can appear in the same assignment. A setting that works in the auditorium may fail badly in the expo hall.
- On-stage politics: Access is negotiated. You need to know where the stage manager allows you to stand, when you can cross, and which people or sponsors must appear in the frame.
- Attendee expectations: Guests increasingly expect to receive their own images quickly, on a phone, without searching a huge public folder. The event-photo distribution guidance on real-time access identifies this as a major underserved part of conference coverage.
A wedding can sometimes tolerate a slower gallery because the emotional event has ended but the couple still wants a considered collection. Conference images have a shorter working life. They feed recap posts, sponsor reports, internal communications, press coverage, and attendee sharing while the conversations are still active.
Practical rule: Don't define the assignment as “photograph the conference.” Define it as “capture, select, label, and distribute the moments each audience needs.”
That principle affects the kit, the shot list, the backup plan, and the gallery architecture. A QR-driven, app-free gallery with permission-controlled retrieval now sits beside shutter speed and aperture as part of the deliverable. If attendees can't find the images that feature them, a technically excellent gallery may still feel like a failed service.
Gear, Light, and the Venue Walkthrough That Saves the Day
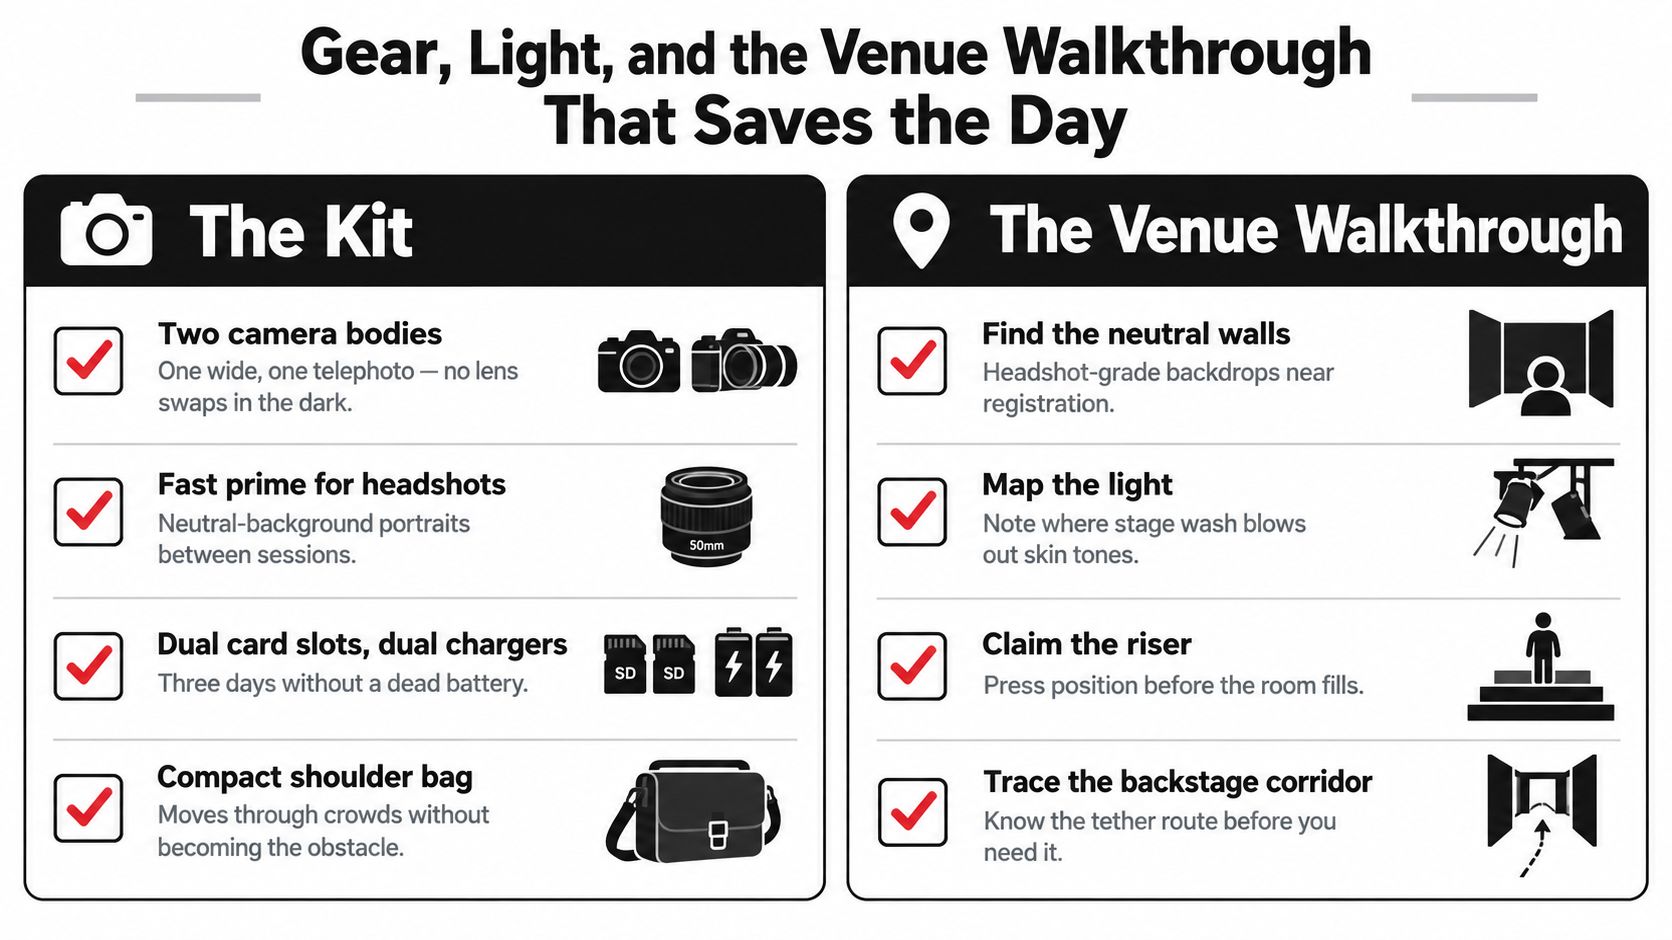
A conference kit has to survive a long day without slowing you down. A practical two-body setup keeps a wide working angle on one camera and a telephoto option on the other. A 24-70mm zoom covers rooms, groups, environmental portraits, and networking scenes. An 80-200mm or 70-200mm telephoto lets you photograph speakers from outside the audience's sightline, which protects both access and the viewer's experience.
A 35mm or 50mm prime helps in tight networking aisles, where a longer lens may force you into walls or through conversations. A fast f/1.8 or f/1.4 prime earns its place on a dim expo floor or in a quiet corridor where flash would interrupt the moment. For people shots, apertures around f/2.8 to f/4 can separate a subject from a cluttered background, but several faces at different distances demand careful focusing. These ranges reflect the trade-off between light intake and depth of field described in practical event-photography guidance.
Build in failure tolerance
Use bodies with dual card slots where possible, configured to write a duplicate to the second card. Splitting RAW and JPEG can make recovery harder unless your workflow specifically requires it. Pack charged spare batteries, two chargers, formatted cards, a lens cloth, a compact flash or speedlight for permitted portrait areas, and a small reflector for headshots.
Set a minimum shutter speed based on the room and the people in it. For dim indoor conditions, 1/125 second gives speakers and applause more protection from blur. 1/60 second may work for typical motion, but active scenes need faster settings. Start conservatively, then watch ISO rather than accepting soft frames. A noisy sharp image can still be delivered, cropped, and matched to an attendee. A blurred frame cannot.
Your delivery plan should influence the kit. If attendees expect QR-driven, app-free access and selfie-matched images inside two hours, keep cards, batteries, and upload equipment organized for handoffs between capture and selection. A camera that feels comfortable is useful. A camera system that leaves you able to select, label, and send files under pressure is more useful.
Spend the first 30 minutes on reconnaissance
Arrive at least 30 minutes early and walk the venue before guests fill it. Map light direction, test shooting positions, and identify locations where exposure will change. Check each area with the same attention you give the stage, because the best camera position may be useless once production staff, attendees, or sponsor displays occupy it.
Look for:
- Stage positions: Confirm whether you can shoot from stage left, stage right, the rear, or a designated riser. Ask the stage manager before doors open.
- Light transitions: Make test frames of the stage, audience, registration area, and expo floor. Note where skin tones shift from cool to warm and where spotlights clip faces.
- Clean portrait backgrounds: Find neutral walls near registration or session rooms. A reliable backdrop saves time when a speaker becomes available without notice.
- Backstage routes: Walk from the green room to the stage. Identify a safe place for a laptop, tether, or backup drive that will not block crew traffic.
- Connectivity and power: Check Wi-Fi strength and available outlets if you will tether or upload quickly. The convenient socket may be unavailable once production begins.
This walkthrough solves problems expensive lenses cannot. It also lets you move without drawing attention because you have already chosen where to stand, where to pause, and where files can begin their trip to the gallery.
Building a Shot Plan Around Capture Phases
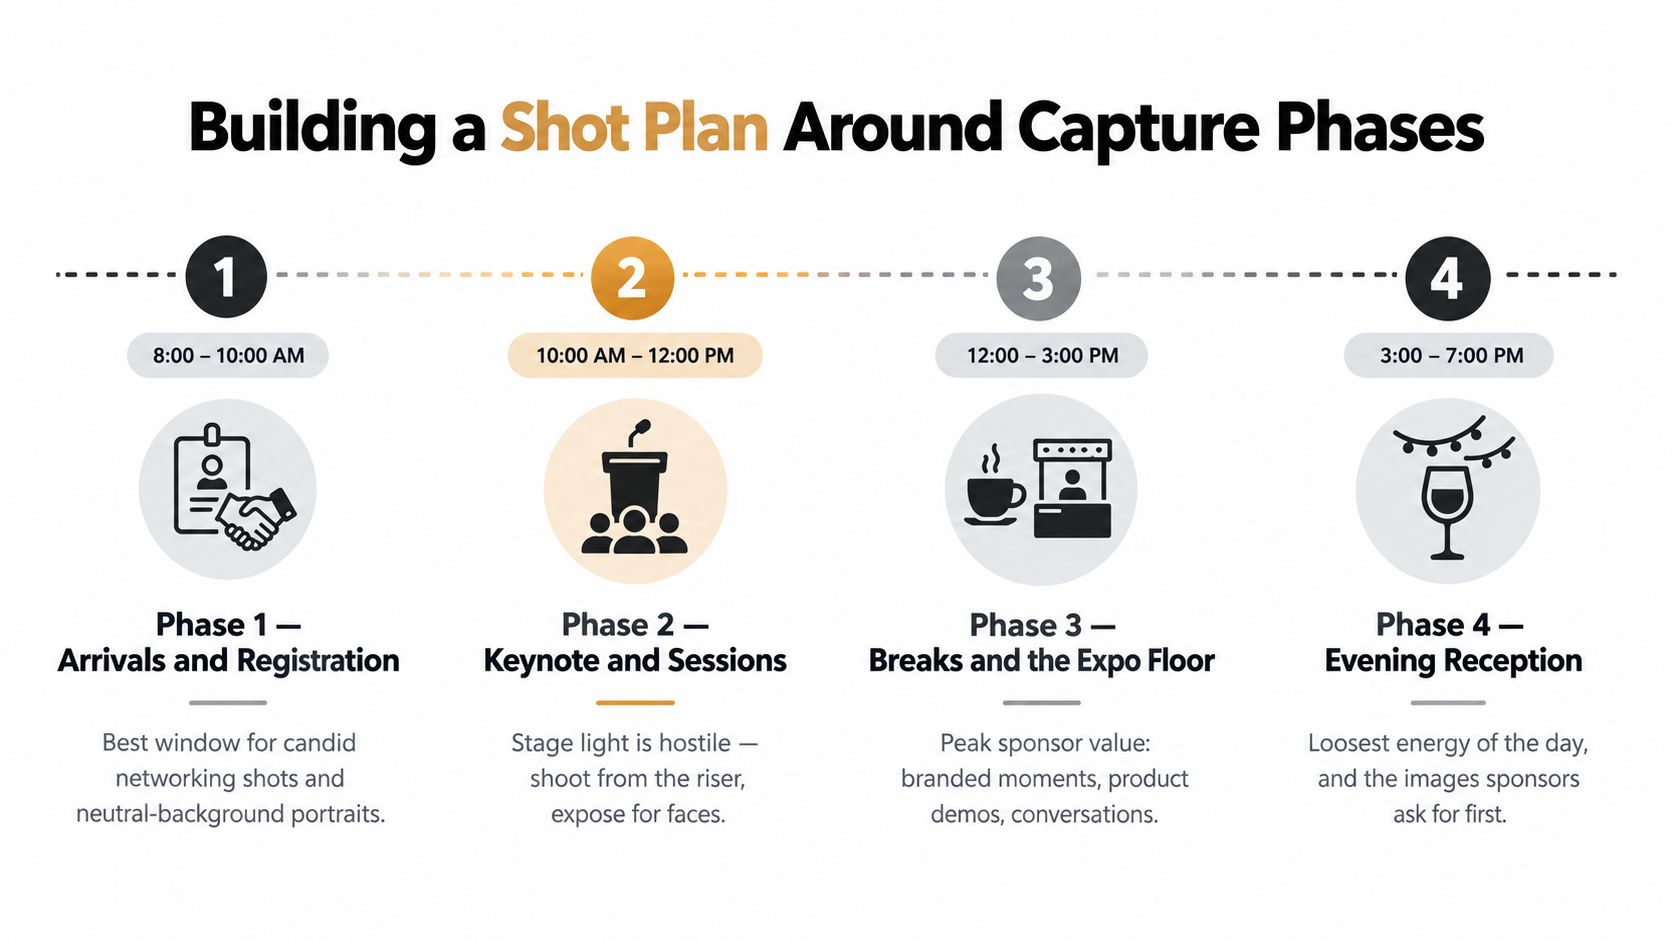
A shot list should guide your attention without turning the day into a mechanical checklist. I organize conference coverage into phases because each phase has different people, light, access, and commercial value. The schedule may move, but the categories keep important gaps from appearing.
Phase one covers arrivals and registration
This is the cleanest time to photograph badges, signage, empty spaces, registration staff, sponsor displays, and early conversations. Attendees are often more relaxed before the first session, so you can make natural portraits without stopping the flow.
Look for handshakes, reunions, introductions, and the first reactions to the venue. If the organizer wants leadership portraits, use the neutral wall you found during the walkthrough and work quickly. Keep the background consistent, then return to candid coverage before the room fills.
Phase two belongs to keynotes and sessions
Use a wide position that shows the scale of the room and a tighter position for expressions, gestures, and speaker interaction with the screen. A telephoto keeps you out of the audience's way, while a lower side angle can place the speaker against branded scenery instead of a blank curtain.
Watch for the moments that cannot be recreated: the first applause, a speaker's laugh, a raised hand, a slide reveal, or a reaction from the front row. Expose for faces when stage light is harsh. If a projection screen is important, make a separate frame that includes readable context rather than trying to preserve every highlight in one exposure.
Phase three moves through breaks and the expo floor
Breaks create the strongest opportunities for sponsor value because people are talking, demonstrating products, scanning materials, and moving through branded spaces. Don't photograph only booths. Show the interaction between the exhibitor and the attendee, then make a second frame that clearly includes the brand.
Breakout rooms need a lighter touch. Enter from the edge, avoid crossing a presenter's sightline, and capture the relationship between facilitator and participants. A fast prime helps in dim rooms, but a 24-70mm gives you flexibility when furniture leaves little room to move.
Phase four is the reception and group-work window
The closing reception often produces looser expressions and more useful networking images than the formal sessions. Schedule leadership groups, award recipients, sponsor representatives, and team portraits before people disperse. For large groups, make several frames and check faces before releasing everyone.
If you're working with a second shooter, divide responsibility by phase or geography. One photographer owns the keynote and stage access, while the other covers audience reactions, sponsor areas, and arrivals. Agree on file naming, card handoff, restricted areas, and the must-have list before the event. Two photographers who both chase the same speaker can still leave the registration desk and breakout rooms uncovered.
Backstage and Headshot Workflows That Actually Ship
Consider a composite scenario: a solo photographer has to cover a SaaS summit, make speaker portraits, photograph sessions, and deliver a sponsor-ready selection the same evening. The solution isn't moving faster at random. It's assigning a purpose to every handoff before the first keynote begins.
The photographer starts with the venue walk. The press riser is confirmed, the route from backstage to the stage is clear, and a laptop can sit on AV power without creating a trip hazard. The two camera bodies are set up before doors open, with a wide lens on one and a telephoto on the other. If a card fails during the keynote, the duplicate recording and second body protect the assignment from becoming unrecoverable.
A headshot block needs a repeatable rhythm
For a controlled speaker portrait, an 85mm prime at f/2.8 provides a flattering working distance and enough depth of field for a face turned slightly toward the light. A single speedlight bounced into a 32-inch collapsible reflector can create a compact setup when the venue has no portrait station.
Keep the subject in one place and make the instructions simple. Three frames per guest gives you a small choice without creating a new culling problem. Check focus and expression immediately, then move to the next person. The goal is a usable file quickly, not an elaborate portrait session that consumes the speaker's preparation window.
A five-minute green-room opening can be valuable, but only if the stage manager knows where you are and when you'll leave. Don't interrupt a briefing, block wardrobe adjustments, or hold a speaker past the agreed handoff. A quiet introduction and a clear exit time keep the portrait workflow from competing with the program.
Backstage etiquette matters: Ask for the access window, respect the handoff signal, and leave before production staff have to ask you twice.
Lock a white-balance preset when the lighting is stable enough to justify it. A setting such as 5200K may provide consistency in a mixed LED environment, but test it against skin tones first and shoot RAW so you retain correction latitude. The important point isn't the number itself. It's avoiding a gallery where every room has a different unexplained color cast.
After each major session, remove the card and copy it to two mirrored SSDs before formatting anything. If the photographer must continue shooting, use the second body or a fresh card rather than interrupting the backup process. During the reception, the first cull can begin, with obvious blinks, missed focus, accidental frames, and duplicates removed before the final selection.
The sponsor set should contain recognizable speakers, branded context, audience energy, and clean images that work in a recap. The attendee set needs a different priority, fast retrieval of personal moments. Treat those as separate outputs from the beginning.
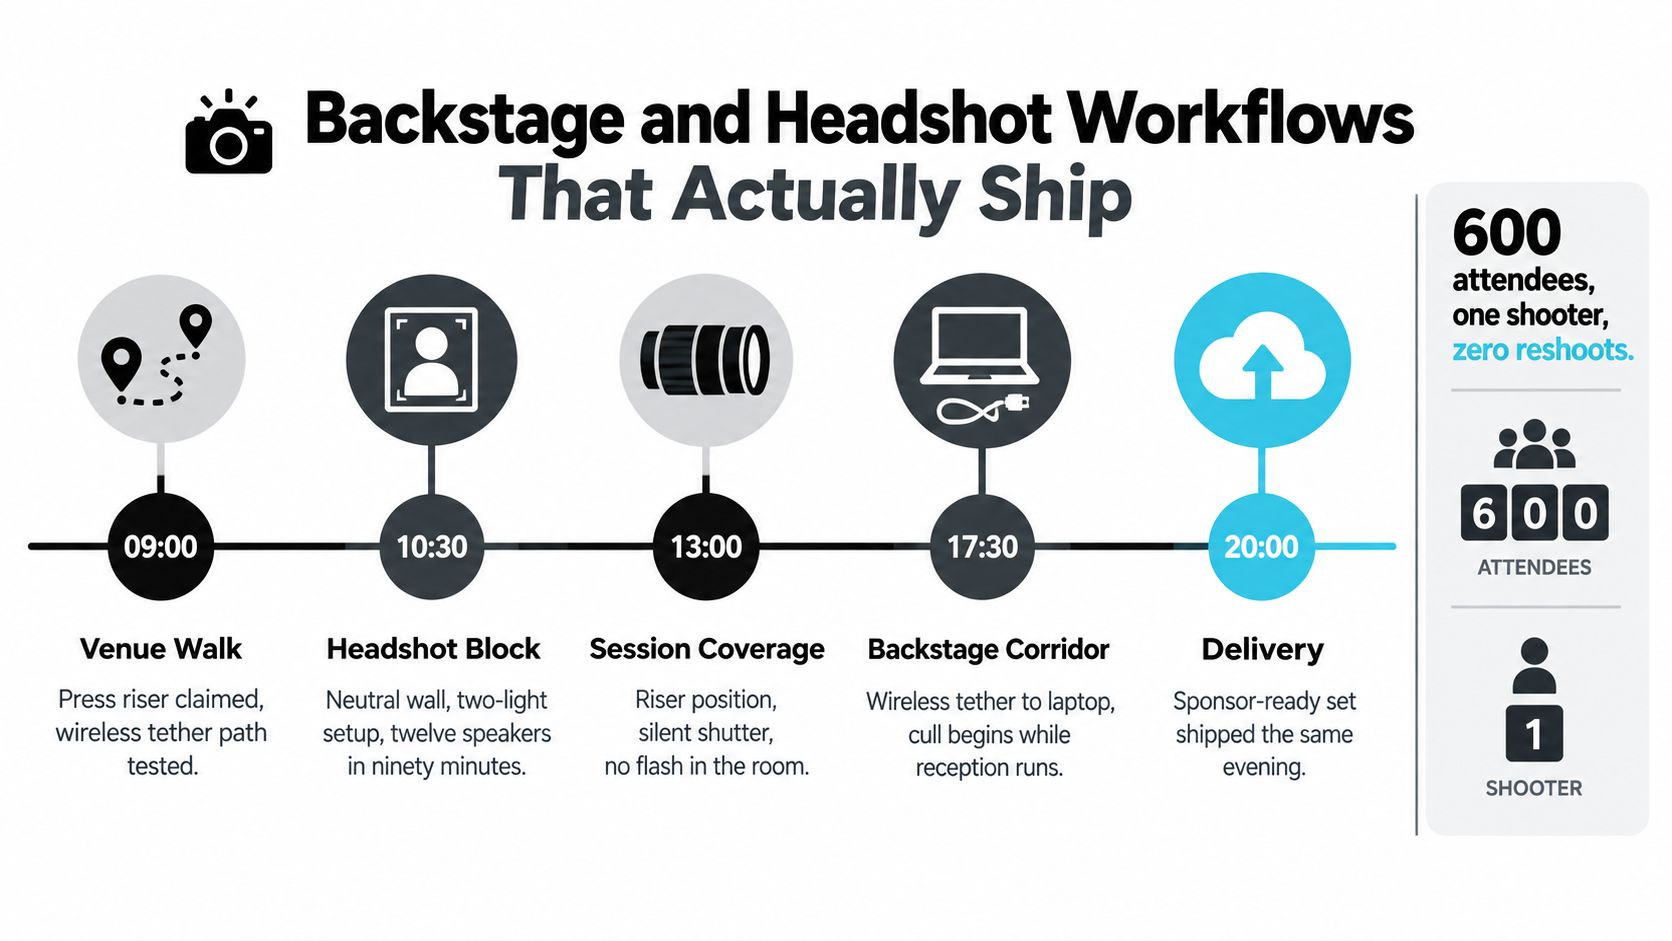
A delivery workspace can be prepared through an event gallery access portal, while the photographer handles culling and captioning locally. The tool is only part of the workflow. The true gain comes from deciding which images are safe to release, which need organizer approval, and which belong in a sponsor-only collection.
How to Share Event Photos With Attendees the Smart Way
A folder handoff saves setup time for the photographer but shifts the work to every attendee. Guests must open a link, understand the folders, scroll through a large collection, and identify themselves among unrelated images. A public social album improves visibility, yet the keynote photo someone wants can disappear beneath booth snapshots, group pictures, and hundreds of other faces.
Conference delivery now needs to account for what happens after the shutter click. Attendees expect a QR-driven, app-free way to find their own images, often within two hours. A find my photos workflow lets them use a selfie or another permitted identifier to retrieve relevant frames instead of searching the full gallery. That makes the same QR code useful at the venue, in a follow-up email, and in the sponsor's post-event campaign.
Comparing the delivery models
| Method | Turnaround | Discoverability | Sponsor Visibility | Consent Control | Return Rate |
|---|---|---|---|---|---|
| Folder handoff | Fast to create, slower for guests to use | Low, because attendees search manually | Moderate, if folders are organized well | Depends on access settings and organizer discipline | Often weakened by browsing friction |
| Public social album | Potentially immediate | Moderate for followers, poor for specific retrieval | High when branding and captions are managed | Limited once images are publicly visible | Strong for visible moments, weaker for personal retrieval |
| Find-my-photos experience | Fast when upload and approval are ready | High, because guests retrieve relevant frames directly | High, with curated sets and branded entry points | Stronger with release rules, opt-out paths, and gated access | More useful when guests reach their own images without scrolling |
The table describes workflow behavior, not guaranteed performance. Research on event-photo sharing reports that over 80% of guests view event photos on a phone, while nearly half scan an on-site QR code when it appears at entry points or displays, according to the event-photo sharing research. A mobile page with no required app download removes a major point of friction. Test the full route before doors open, from QR scan to selfie match to image display, because a fast capture workflow still fails if the gallery is slow or confusing.
Decide what gets released
Choose between an open gallery and a gated release before the event. An open gallery gives guests immediate access but requires careful privacy review. A gated gallery gives the organizer more control when the event includes private sessions, restricted speakers, or attendees who opted out.
Watermarks, full-resolution downloads, and editor-approved batches each create a practical trade-off. A watermark protects a preview but can slow social sharing. Full-resolution files are convenient and may require tighter permissions. Immediate release supports live engagement, while approved batches provide more control over expressions, sponsor visibility, and sensitive content.
Set a release deadline that matches the promised attendee experience. If the target is delivery within two hours, prepare the upload queue, approval rules, and gallery link before the first session ends. A photographer can send a curated collection through an attendee photo upload workflow, then let the organizer decide which audience receives the link. Curating the set keeps production volume separate from the attendee experience and prevents raw selections from reaching a public folder.
Setting Up a QR Code Photo Gallery With Selfie Matching
A QR code is only the front door. The organizer still needs a controlled gallery, a clear permission model, and an answer for attendees who don't want to use selfie matching.
Start with the privacy preflight
Before uploading anything, confirm how the selected service processes face data. Ask whether it stores encrypted biometric vectors rather than raw face images, how long those vectors remain available, who can access them, and how an attendee can opt out. Don't treat a privacy statement as a substitute for event policy. The organizer should decide what the registration notice, signage, and follow-up message say.
Create an alternative retrieval path for people who decline matching. Keyword search, a registration identifier, or organizer-assisted retrieval can work, provided it doesn't expose the entire gallery. The fallback should be explained beside the QR code, not hidden in a support document.
Build the gallery before the doors open
- Create the event workspace. Add the event name, date, organizer details, brand assets, and the release rules.
- Prepare the upload set. Cull obvious failures, remove restricted images, and use consistent filenames. A clean selection makes processing and human review easier.
- Generate the share link and QR code. Test it on different phones, including a device that isn't logged into the organizer's account.
- Place the code where guests naturally pause. Registration desks, badge stations, table tents, venue displays, and the closing-slide loop are useful locations.
- Write the attendee instruction. “Scan, take a selfie, and view your photos” is clearer than a generic “visit the gallery.”
- Create a support route. Monitor an inbox or event contact channel for failed matches, opt-out requests, and guests who need the alternative search method.
An attendee should be able to scan the code, upload a selfie, and receive only the frames that contain their face. The organizer controls whether those results are immediately available, require approval, or sit behind a gated release.
Test the operational details
Warm up the server or processing workflow the night before if the platform supports it. Print a spare QR sign and keep it near the exit in case the main display is removed. Give the registration team a one-sentence explanation and a privacy answer they can repeat accurately.
Use the gallery settings area to review sharing and attendee access controls before publication. Check the visible branding, download permissions, opt-out route, and whether a sponsor collection is separated from the general attendee gallery.
The morning after, review time to first shared image, failed-match requests, scans, gallery visits, downloads, and the proportion of attendees who claim images. Those measures tell you whether the bottleneck was capture, upload, retrieval, or permission design. Don't judge the system only by the number of images uploaded. A large gallery that guests can't browse is still a distribution problem.
Your Integrated Conference Photography Workflow
A conference workflow succeeds only when capture, approval, and attendee delivery are planned as one service. The camera records the moment, but the post-shutter system determines whether the right person finds it quickly.
Before the event
Confirm the schedule, contact sheet, restricted areas, sponsor requirements, release policy, and delivery deadlines. Walk the venue, test lighting zones, reserve the portrait location, and confirm stage access. Set the delivery target before shooting, especially if attendees expect QR access, app-free retrieval, and selfie-matched photos within two hours.
Use this printable pre-event checklist:
- Lens kit: 24-70mm, telephoto, fast prime, and a wide option if required.
- Flash power: Charged batteries, speedlight, reflector, and permitted modifier.
- Card count: Formatted cards with dual-slot recording configured.
- Backup drive: Two available SSD destinations, with tested cables.
- Release form: Organizer-approved privacy and usage language.
- Sharing link: Tested live event photo sharing link and QR code.
- Contact sheet: Speakers, sponsors, leadership, and required groups.
- Venue route: Stage, backstage, portrait wall, registration, and power locations.
During capture
Cover arrivals, sessions, breaks, and the reception as connected phases. Mark required images as they are completed. With a second shooter, divide access and geography so one person protects the stage while the other covers audience reactions, sponsors, and attendee moments.
Back up cards to two locations during natural breaks. Make the first cull about obvious technical failures, then separate sponsor-ready selections from attendee retrieval images. Agree on deliverables and approval rules before the event, rather than promising an image count during a busy turnaround.
After the event
Apply consistent color corrections and export versions for social, web, sponsor decks, and full-resolution delivery. Publish approved images through the QR code gallery with selfie matching via the organizer delivery workspace. Send the attendee prompt by email, SMS, or the event's preferred channel while the experience remains familiar.
Manage permissions and presentation through the sharing and attendee access controls. Check branding, download permissions, the opt-out route, and sponsor collection settings. Saucial provides organizer-controlled event photo sharing with drag-and-drop uploads, QR distribution, and selfie-based retrieval. The Saucial event photo sharing workflow can sit alongside the photography plan, giving guests a direct route to relevant images instead of a crowded folder.
Track time to first photo shared and the percentage of attendees who claim their photos through selfie matching. Add feedback from sponsors and registration staff. Their comments can expose unclear signage, consent questions, or upload delays that image counts miss. A finished shoot is not the final deliverable. The attendee's successful retrieval is.